分类 wifidog流程 下的文章

WIFIdog 协议分析与应用

WIFIdog 简单说就是用户在wifi环境下使用wifi交互登陆的方法

Wifidog Portal认证示例PHP脚本

转载自:http://talk.withme.me/?p=267#codesyntax_7

wifi 路由推荐使用海蜘蛛 3.3 wifi营销固件

这里路由简称 AP

验证服务器简称 AUTH SERVSER

AP 请求是使用$_GET 方法传递数据给AUTH SERVSER

请求参数

下面的参数获取为简写

    $stage = isset($_GET["stage"]) ? $_GET["stage"] : null;
    $ip = isset($_GET["ip"]) ? $_GET["ip"] : null;
    $mac = isset($_GET["mac"]) ? $_GET["mac"] : null;
    $token = isset($_GET["token"]) ? $_GET["token"] : null;
    $incoming = isset($_GET["incoming"]) ? $_GET["incoming"] : null;
    $outgoing = isset($_GET["outgoing"]) ? $_GET["outgoing"] : null;
    $gw_id = isset($_GET["gw_id"]) ? $_GET["gw_id"] : null;

实例

先介绍数据库的结构,我构建的数据库名是portal,表名是User,用于记录等录用用户的用户名、密码等的信息:

create database portal;
CREATE TABLE `User` (
`Username` varchar(255) NOT NULL,
`Password` text NOT NULL,
`Token` text,
`LoginTime` datetime DEFAULT NULL,
`Gw_address` text,
`Gw_port` text,
`Gw_id` text,
`Mac` text,
`Url` text,
PRIMARY KEY (`Username`)
) ENGINE=InnoDB DEFAULT CHARSET=utf8;

首先介绍的是登陆脚本,即上一篇文章介绍的LoginScriptPathFragment配置项配置的脚本(详细介绍见上一篇文章)。

auth.php,主要用于认证服务器验证路由网关提交的token。

<?php
    //首先获取URL传递过来的参数,包括stage、ip、mac、token、incoming、outgoing和gw_id.
    $stage = isset($_GET["stage"]) ? $_GET["stage"] : null;
    $ip = isset($_GET["ip"]) ? $_GET["ip"] : null;
    $mac = isset($_GET["mac"]) ? $_GET["mac"] : null;
    $token = isset($_GET["token"]) ? $_GET["token"] : null;
    $incoming = isset($_GET["incoming"]) ? $_GET["incoming"] : null;
    $outgoing = isset($_GET["outgoing"]) ? $_GET["outgoing"] : null;
    $gw_id = isset($_GET["gw_id"]) ? $_GET["gw_id"] : null;
    //mac和token是必需参数,不能为空,只有mac和token均不为空才有可能通过验证,缺失参数将不显示登录表单.
    if(!empty($mac) && !empty($token)){
        //mysql连接,相应的参数mysql_host、mysql_user和mysql_password需要换成你自己的参数.
        $con = mysql_connect(‘mysql_host’, ‘mysql_user’, ‘mysql_password’);
        //数据库连接失败,验证不通过.
        if(!$con){
            echo "Auth: 0";
        }
        else{
            //选择mysql数据库,如果你的数据库名不是portal,请自行更改.
            mysql_select_db(‘portal’, $con);
            //用户登陆成功后,会把用户的参数(ip、mac和系统自动生成的token等)记录到数据库,系统主要通过mac识别用户,当然这种方式在大规模系统中可能存在漏洞.
            $result = mysql_query("SELECT * FROM User WHERE Mac='".$mac."' AND Token='".$token."'");
            //如果token匹配,验证通过,否则验证失败.
            if(!empty($result) && mysql_num_rows($result) != 0){
                echo "Auth: 1";
            }
            else{
                echo "Auth: 0";
            }
        }
    }
    else{
        echo "Auth: 0";
    }
?>

接下来介绍的是登陆成功脚本,即上文介绍的PortalScriptPathFragment配置项配置的脚本(详细介绍见上一篇文章)。

portal.php,主要作用是告知用户登录成功,并跳转用户登录前访问的页面。

<?php
    //告知用户登陆成功.
    echo ‘登录成功’;
    //认证前用户访问任意url,然后被重定向登录页面,session记录的是这个“任意url”.
    $url = $_SESSION["url"];
    //跳转到登陆前页面.
    header("Location: ".$url);
?>

当然,这个脚本没有任何界面,为提升用户体验,你可以设计一个好的界面,显示登陆成功信息。

接下来介绍的是错误信息展示脚本,即上文介绍的MsgScriptPathFragment配置项配置的脚本,(详细介绍见上一篇文章)。

gw_message.php,主要作用是当认证过程出现错误的时候,向用户显示用户信息。

<?php
    $message = null;
    if(isset($_GET["message"])){
        $message = $_GET["message"];
    }
    echo $message;
?>

脚本非常简单,错误信息就在message参数中,告知用户即可。当然这个错误信息是英文的,如有需要,可以做做翻译,以提升用户体验。这个脚本同样没有任何界面,需自行设计。

接下来介绍的是心跳脚本,即上文介绍的PingScriptPathFragment配置项配置的脚本,(详细介绍见上一篇文章)。
ping.php,其主要作用是路由确认认证服务器仍然存活,没有死机,另外一个功能是认证服务器可以收集路由的负载等的信息。路由器会定时访问这个脚本,脚本必须回复Pong,否则将认为认证服务器失效而出错。

<?php
    echo ‘Pong’;
?>

最后介绍的是登陆脚本,即上文介绍的AuthScriptPathFragment配置项配置的脚本,(详细介绍见上一篇文章)。

login.php,主要作用是显示登录界面,用户登陆成功后,跳转到路由器网关的特定接口。

<?php
    //获取url传递过来的参数
    $gw_address = isset($_GET["gw_address"]) ? $_GET["gw_address"] : null;
    $gw_port = isset($_GET["gw_port"]) ? $_GET["gw_port"] : null;
    $gw_id = isset($_GET["gw_id"]) ? $_GET["gw_id"] : null;
    $mac = isset(isset($_GET["mac"]) ? isset($_GET["mac"] : null;
    $url = isset($_GET["url"]) ? $_GET["url"] : null;
    //gw_address、gw_port、gw_id和mac是必需参数,缺少不能认证成功.
    if(!empty($gw_address) && !empty($gw_port) && !empty($gw_id) && !empty($mac)){
        //参数初始化
        $post_username = null;
        $post_password = null;
        $error_message = null;
        //如果用户提交用户名和密码,进行验证
        if(isset($_POST["username"]) && isset($_POST["password"])){
            $post_username = $_POST["username"];
            $post_password = $_POST["password"];
            //mysql数据库连接,相应的参数mysql_host、mysql_user和mysql_password需要换成你自己的参数.
            $con = mysql_connect(‘mysql_host’, ‘mysql_user’, ‘mysql_password’);
            //数据库连接失败,展示错误信息
            if(!$con){
                $error_message = "数据库连接错误!".mysql_error();
                //login_view.php展示的是登陆表单(下文介绍),如有错误,展示错误信息.
                include("login_view.php");
            }
            else{
                //选择mysql数据库,如果你的数据库名不是portal,请自行更改.
                mysql_select_db(‘portal’, $con);
                //用户名和密码验证.
                $result = mysql_query("SELECT * FROM User WHERE Username='".$post_username."' AND Password='".$post_password."'");
                if(!empty($result) && mysql_num_rows($result) != 0){
                    //用户名和密码验证成功,生成随机token.
                    $token = "";
                    $pattern="1234567890abcdefghijklmnopqrstuvwxyzABCDEFGHIJKLOMNOPQRSTUVWXYZ";
                    for($i=0;$i<32;$i++){
                        $token .= $pattern{mt_rand(0,35)};
                    }
                    //把token等参数写入数据库,已被用于后续验证(上文提到的auth.php).
                    mysql_query("Update User SET Token='".$token."', LoginTime='".date("Y-m-d H:i:s")."', Gw_address='".$gw_address."', Gw_port='".$gw_port."', Gw_id='".$gw_id."', Mac='".$mac."', Url='".$url."' WHERE Username='".$post_username."'");
                    $error_message = mysql_error();
                    //把用户名和url存进session,以备后续使用.
                    session_start();
                    $_SESSION['username'] = $post_username;
                    $_SESSION['url'] = $url;
                    //登陆成功,跳转到路由网管指定的页面.
                    header("Location: http://".$gw_address.":".$gw_port."/wifidog/auth?token=".$token);
                }
                else{
                    //登录失败,显示错误信息.
                    $error_message = "用户名或密码错误!";
                    include("login_view.php");
                }
            }
        }
        else{
            include("login_view.php");
        }
    }
?>

Login_view.php登陆表单。

<html>
<head>
    <meta http-equiv="Content-Type" content="text/html; charset=utf-8" />
    <meta name="language" content="en" />
    <title>Portal Login</title>
</head>
<body>
    <form method="post" action="<?php echo "login.php?gw_address=$gw_address&gw_port=$gw_port&gw_id=$gw_id&mac=$mac&url=$url"; ?>">
        <label for="username">Username</label>
        <input type="text" id="username" name="username" value="<?php echo $post_username; ?>"/>
        <label for="password">Password</label>

本文章由 http://www.wifidog.pro/2015/02/06/wifidog%E5%88%86%E6%9E%90-1.html 整理编辑,转载请注明出处
asp.net MVC 使用wifidog 协议实现wifi认证

在网上看到的很多实现的wifidog 协议一般都是PHP 的,了解一下PHP 但是比较喜欢.net ,所以实现了简单的一个进行登录认证的功能

(好多协议中的功能目前没有实现)

  1. 开发环境(vs2010 )

  2. 路由(支持wifidog协议的 ddwrt )

  3. 环境的配置

    主要是进行路由的配置

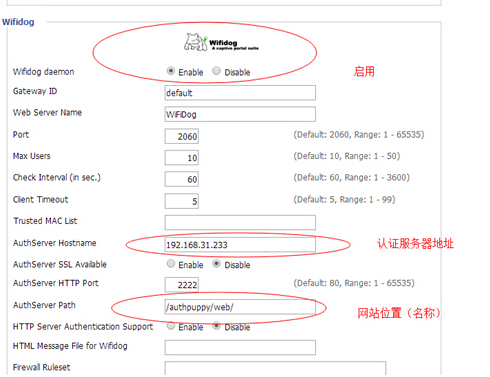
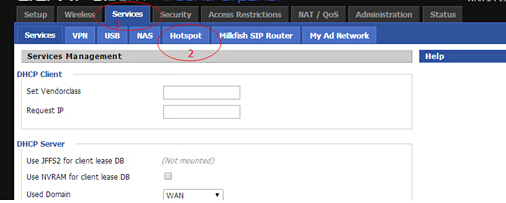
    截图如下:
    1.jpg

2.jpg

注意红圈的部分这个我按照php 的配置

asp.net MVC 的配置如下:

端口 9999 authserver path /login/

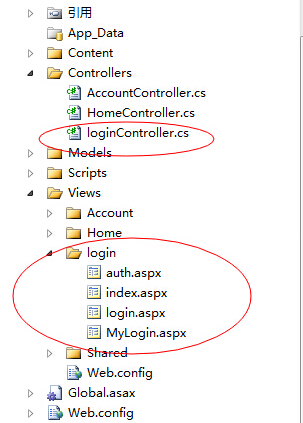
  1. MVC 项目布局:
    3.jpg

loginController.cs 代码如下:

public class loginController : Controller
{
//
// GET: /login/

public ActionResult login()
{
string demo = Request.QueryString.ToString();
ViewData["demo"]=demo;
ViewData["gw_address"] = Request.QueryString["gw_address"];
ViewData["gw_port"] = Request.QueryString["gw_port"];
ViewData["gw_id"] = Request.QueryString["gw_id"];
//ViewData["url"]=Request.QueryString["url"];
string url = Request.QueryString["url"];
// string url = "www.cnblogs.com";

ViewData["url"] = url;
Response.Write("Auth:1");
return View();
}

public ActionResult index()
{
return View();
}

public ActionResult auth()
{
// result data = new result();

Response.Write("Auth:1");
return View();


}
public ActionResult MyLogin()
{

return View();
}
}

代码写的比较乱,但是还是比较简单的。

login view 的代码如下:

<%
Label1.Text = ViewData["demo"].ToString() + "<br/>" ;

if (ViewData["url"] == null)
{

}
else
{
string a = ViewData["gw_address"].ToString();
string p = ViewData["gw_port"].ToString();
string token = Guid.NewGuid().ToString();
string url=ViewData["url"].ToString();
string demo = "http://" + a + ":" + p + "/wifidog/auth?token=" + token + "url=" + url;

ViewData["authurl"] = demo;
Application["authurl"] = demo;
}

%>

dalong demo app
</h2>
<p>


<h1>
登陆页面
</h1>
<asp:Label ID="Label1" runat="server" Text="Label"></asp:Label>
</p>

[ <%: Html.ActionLink("进入", "MyLogin", "login")%> ]

Mylogin view 的代码如下:

<%

string tepdemo = "Auth: 1";
byte[] data = System.Text.Encoding.Default.GetBytes(tepdemo);
char[] list = System.Text.Encoding.Default.GetChars(data);
Response.Write(list, 0, list.Length);
Response.Redirect(Application["authurl"].ToString());
%>
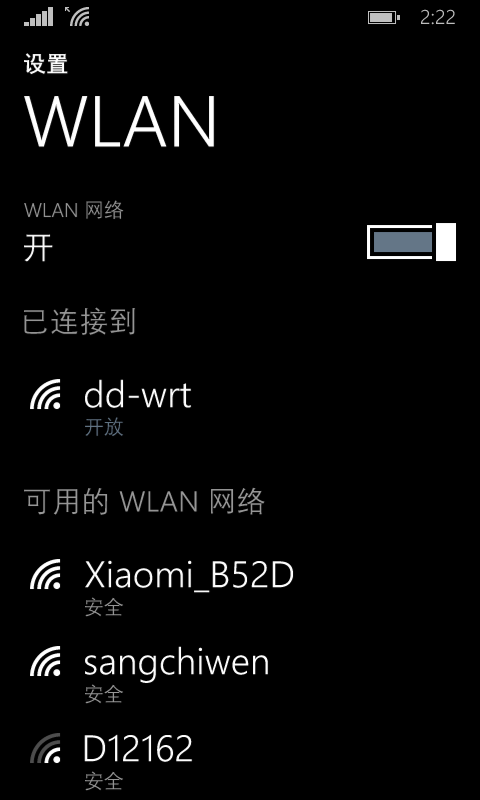
  1. 手机端的测试效果:
    4.jpg

window phone 连接wifi 的显示界面

点击进入如下效果:
5.png

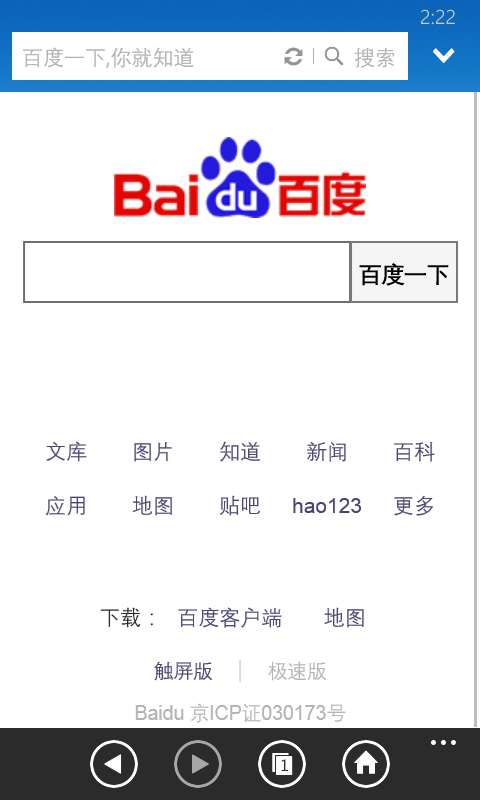
连接成功标志:

打开网页:
6.png

其中对于认证最重要的是按照协议返回的数据:

比如我通过返回的数据:

Auth: 1

拒绝为: Auth: 0

以上只是简单的测试,实际应用需要很多的东西。

本文章由 http://www.wifidog.pro/2015/02/06/asp-wifidog.html整理编辑,转载请注明出处

OpenWrt WiFiDog进程简单描述其程序架构

最近网络营销路由器很火,在智能路由器的烘托下,广告路由器也在如火如荼的展开,不少公司都在向这块进发。

WiFiDog 进程的核心是iptables的规则路由,如若想深入了解其运行步骤需要对iptables有个基础的认识Chain, 三个表五条链。

除了iptables之外,还有一个处理认证前的HTTP请求的web服务器,默认端口为2060。

还有一些线程完成定期汇报,检查状态等。

认证服务器需要自己搭建。

线程:
1)ping 保活协议
2)定时检查客户端是否超时
3)HTTP 请求处理
4)一个不经常用的线程:wifidog 控制线程

本文章由http://www.wifidog.pro/2015/02/05/wifidog%E6%A1%86%E6%9E%B6.html整理编辑,转载请注明出处

wifidog配置中文说明

#网关ID
GatewayID default
#外部网卡
ExternalInterface eth0
#无线网卡
GatewayInterface eth0
#无线IP
GatewayAddress 192.168.1.1
#路由状态HTML
HtmlMessageFile wifidog-msg.html 
#验证服务器
#AuthServer {
#    Hostname                 (Mandatory; Default: NONE)
#    SSLAvailable             (Optional; Default: no; Possible values: yes, no)
#    SSLPort                  (Optional; Default: 443)
#    HTTPPort                 (Optional; Default: 80)
#    Path                     (Optional; Default: /wifidog/ Note:  The path must be both prefixed and suffixed by /.  Use a single / for server root.)
#   LoginScriptPathFragment  (Optional; Default: login/? Note:  未用户登录重定向地址.)
#   PortalScriptPathFragment (Optional; Default: portal/? Note:  登录成功后重定向地址.)
#   MsgScriptPathFragment    (Optional; Default: gw_message.php? Note:  退出登录后重定向地址.)
#   PingScriptPathFragment    (Optional; Default: ping/? Note:  路由状态心跳地址.)
#   AuthScriptPathFragment    (Optional; Default: auth/? Note:  路由请求服务器验证地址 and 验证心跳地址(stage=counters).)
#}

AuthServer {
    Hostname auth.com
    #SSLAvailable yes
    Path /
}

# 是否后台进程
# Daemon 1
#默认网关端口
# Default: 2060
GatewayPort 80

# HTTP进程名
# HTTPDName WiFiDog

# HTTP最大连接数
# Default: 10
# HTTPDMaxConn 10

# WEB页面加密码后显示名
# Default: WiFiDog
# HTTPDRealm WiFiDog

# WEB加验证
# HTTPDUserName admin
# HTTPDPassword secret

# 心跳间隔时间
# Default: 60
CheckInterval 60

# 心跳间隔次数 验证超时数等于 CheckInterval*ClientTimeout 
ClientTimeout 2

# 信任的MAC地址,加入信任列表将不用登录可访问
#TrustedMACList 00:00:DE:AD:BE:AF,00:00:C0:1D:F0:0D

#其他防火墙设置

#全局
FirewallRuleSet global {
    ## To block SMTP out, as it's a tech support nightmare, and a legal liability
    #FirewallRule block tcp port 25

    ## Use the following if you don't want clients to be able to access machines on 
    ## the private LAN that gives internet access to wifidog.  Note that this is not
    ## client isolation;  The laptops will still be able to talk to one another, as
    ## well as to any machine bridged to the wifi of the router.
    # FirewallRule block to 192.168.0.0/16
    # FirewallRule block to 172.16.0.0/12
    # FirewallRule block to 10.0.0.0/8

    ## This is an example ruleset for the Teliphone service.
    #FirewallRule allow udp to 69.90.89.192/27
    #FirewallRule allow udp to 69.90.85.0/27
    #FirewallRule allow tcp port 80 to 69.90.89.205
}

# 新验证用户
FirewallRuleSet validating-users {
    FirewallRule allow to 0.0.0.0/0
}

#正常用户
FirewallRuleSet known-users {
    FirewallRule allow to 0.0.0.0/0
}

#未知用户
FirewallRuleSet unknown-users {
#域名已修改源码实现,直接下载的不行的...
    FirewallRule allow to baidu.com
    FirewallRule allow udp port 53
    FirewallRule allow tcp port 53
    FirewallRule allow udp port 67
    FirewallRule allow tcp port 67
}

#锁住用户
FirewallRuleSet locked-users {
    FirewallRule block to 0.0.0.0/0
}

本文章由 http://www.wifidog.pro/2015/02/04/wifidog-conf.html 整理编辑,转载请注明出处