分类 服务器架设 下的文章

AuthPuppy authentication server for Wifidog networks, Installation of authpuppy and prerequisites in Debian

sudo apt-get install apache2
sudo apt-get install php5

These following commands are optionnals but may be help a lot.
sudo apt-get update
sudo apt-get upgrade --show-upgraded
end of optionnal commands

sudo apt-get install postgresql postgresql-contrib (if you plan to use postresql database)
or
sudo apt-get install mysql-server (if you plan to use mysql database)

*** Both of them (mysql or postgres) are on the same level. Using one of them is only a question of choice ***

sudo apt-get install php5-dev
sudo apt-get install php-pear
sudo apt-get install apache2-prefork-dev build-essential
pecl install apc

in the dynamic extensions part of php.ini
add extension=apc.so in /etc/php5/apache2/php.ini
add extension=apc.so in /etc/php5/cli/php.ini

change short_open_tag=on to off in php.ini (apache dir and cli dir)

by doing
sudo nano /etc/php5/apache2/php.ini
ctrl o ctrl x when everything is written

sudo nano /etc/php5/cli/php.ini
ctrl o ctrl x when everything is written

add subdirectory "authpuppy" in /var/log/apache2
by doing this
cd /var/log/apache2
sudo mkdir authpuppy
cd /

sudo a2enmod rewrite
sudo /etc/init.d/apache2 restart

sudo apt-get install php5-pgsqlp (if you are using postgresql database)
sudo apt-get install php5-mysql (if you are using mysql database)

To make sure that pdo and pdo-mysql or pdo and pdo-pgsql are correctly installed
type this command

sudo php -m

and you should see them among all the php5 modules installed.

sudo apt-get install php5-curl
sudo apt-get install php5-xsl

download last version of authpuppy, copy it in the root tmp dir

cd /tmp
sudo tar xvzf authpuppy--_.tgz
sudo mv authpuppy /var/www/

add these following lines in httpd.conf in the /etc/apache2 directory
by doing
sudo nano /etc/apache2/httpd.conf and copy and paste these following lines

<VirtualHost *:80>
       ServerAdmin webmaster@localhost
       ServerName authpuppy.localhost
       ServerAlias authpuppy.test

       DocumentRoot /var/www/authpuppy/web
       DirectoryIndex index.php
       <Directory /var/www/authpuppy/web/>
               Options Indexes FollowSymLinks MultiViews
               AllowOverride All
               Order allow,deny
               allow from all
       </Directory>

       Alias /sf /var/www/authpuppy/lib/vendor/symfony/data/web/sf
       <Directory "/var/www/authpuppy/lib/vendor/symfony/data/web/sf">
               AllowOverride All
               Allow from All
       </Directory>

       ErrorLog /var/log/apache2/authpuppy/error.log

       # Possible values include: debug, info, notice, warn, error, crit,
       # alert, emerg.
       LogLevel warn

       CustomLog /var/log/apache2/authpuppy/access.log combined

</VirtualHost>

ctrl-o ctrl-x

Note : To make sure that authpuppy will be launched correctly, it can help that the hosts
file in /etc directory have this line

127.0.0.1 authpuppy.localhost

by doing
sudo nano /etc/hosts
ctrl-o ctrl-x
Now, do these commands in terminal :

cd /var/www/authpuppy

sudo chown -R a+w config
sudo chown -R www-data cache
sudo chown -R www-data log
sudo chown -R www-data data
sudo chown -R www-data plugins
sudo chown -R www-data web

cd /

if you are using postgresql :

sudo -s -u postgres
createuser authpuppy --pwprompt
type n for each questions
createdb authpuppy --encoding=UTF-8 --owner=authpuppy

Type exit

if you are using mysql

user@yourserver $> mysqladmin -uroot -p create authpuppy
Enter password: #Enter the root password
user@yourserver $> mysql -uroot -p
Enter password:
Welcome to the MySQL monitor. Commands end with ; or \g.
Your MySQL connection id is 45
Server version: 5.0.51a-3ubuntu5.5 (Ubuntu)

Type 'help;' or '\h' for help. Type '\c' to clear the buffer.

mysql> create user 'authpuppy'@'localhost' identified by 'authpuppydev';
Query OK, 0 rows affected (0.21 sec)

mysql> grant all privileges on authpuppy.* to 'authpuppy'@'localhost'
with grant option;
Query OK, 0 rows affected (0.02 sec)

Type exit

Everything's may be ok now.

To make sure that you have a proper and clean installation
type :

symfony cc

in the /var/wwww/authpuppy directory.

Use your internet browser and type : http://authpuppy.localhost

Do not use chromium browser, there's a bug in it about opening local web server

本文章由 http://www.wifidog.pro/2015/02/25/Debian-install-authpuppy.html 整理编辑,转载请注明出处
搭建自己的wifidog认证服务器

本人刚刚开始研究这个,看到有很多人在求自建认证服务器,心得如下,实现 wifidog 4 个接口: portal,login,auth,ping (还有一个get_gw_message.php 的接口,可不用实现)
简单来说,就是路由器会以GET方式请求 你的服务器(加入了白名单) 以下四个地址:
http://认证服务器/路径/login
http://认证服务器/路径/auth
http://认证服务器/路径/ping
http://认证服务器/路径/portal

以下以php为例子,实现
( 我是写了一个rewrite , 把所有请求转发到了 index.php?q=,当然,你也可以每个请求建立一个文件夹下一个 index.php)

具体代码如下:

$q = $_GET['q'] ;
$q = explode('/',$q) ;
$q = $q[0] ;
$a = '' ;
if(!empty($q[1])) $a = $q[1] ;


if($q == 'portal'){
        print 'portal' ;
}

if($q == 'login'){
        print 'login' ;
        $gw_port = $_GET['gw_port']  ;
        $gw_address = $_GET['gw_address']  ;
        //token 自己生成一个
        print '<br /><a href="http://'.$gw_address.':'.$gw_port.'/wifidog/auth?token=789">login</a>' ;
}

if($q == 'auth'){
        $token =  $_GET['token']  ;
        if($token == '789') print "Auth: 1"; 
        else print "Auth: 0"; 
}


if($q == 'ping') print 'Pong' ;

如果你想看一下,路由器到底请求了你些什么,可以看日志或者自己加个写入

$time = date('YmdHis') ;
file_put_contents(dirname(__FILE__) . '/get_'.$q.'_'.$time.'.txt',var_export($_GET,true)) ;

本文章由 http://www.wifidog.pro/2015/02/10/wifidog%E8%AE%A4%E8%AF%81%E6%9C%8D%E5%8A%A1%E5%99%A8-1.html 整理编辑,转载请注明出处

asp.net MVC 使用wifidog 协议实现wifi认证

在网上看到的很多实现的wifidog 协议一般都是PHP 的,了解一下PHP 但是比较喜欢.net ,所以实现了简单的一个进行登录认证的功能

(好多协议中的功能目前没有实现)

  1. 开发环境(vs2010 )

  2. 路由(支持wifidog协议的 ddwrt )

  3. 环境的配置

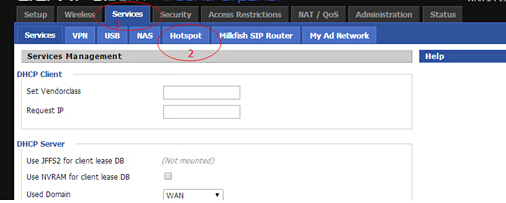
    主要是进行路由的配置

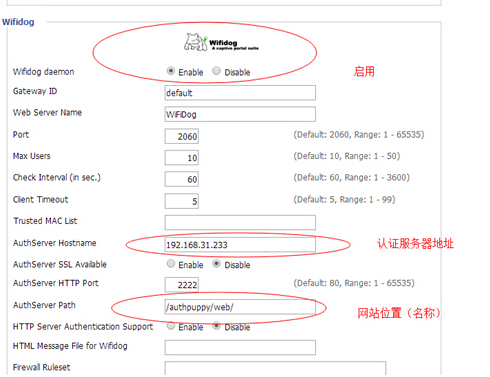
    截图如下:
    1.jpg

2.jpg

注意红圈的部分这个我按照php 的配置

asp.net MVC 的配置如下:

端口 9999 authserver path /login/

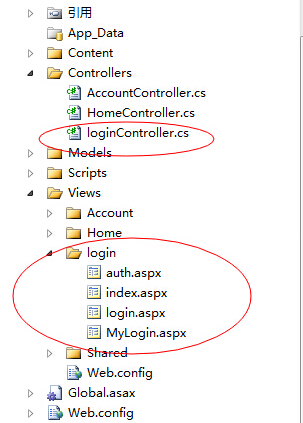
  1. MVC 项目布局:
    3.jpg

loginController.cs 代码如下:

public class loginController : Controller
{
//
// GET: /login/

public ActionResult login()
{
string demo = Request.QueryString.ToString();
ViewData["demo"]=demo;
ViewData["gw_address"] = Request.QueryString["gw_address"];
ViewData["gw_port"] = Request.QueryString["gw_port"];
ViewData["gw_id"] = Request.QueryString["gw_id"];
//ViewData["url"]=Request.QueryString["url"];
string url = Request.QueryString["url"];
// string url = "www.cnblogs.com";

ViewData["url"] = url;
Response.Write("Auth:1");
return View();
}

public ActionResult index()
{
return View();
}

public ActionResult auth()
{
// result data = new result();

Response.Write("Auth:1");
return View();


}
public ActionResult MyLogin()
{

return View();
}
}

代码写的比较乱,但是还是比较简单的。

login view 的代码如下:

<%
Label1.Text = ViewData["demo"].ToString() + "<br/>" ;

if (ViewData["url"] == null)
{

}
else
{
string a = ViewData["gw_address"].ToString();
string p = ViewData["gw_port"].ToString();
string token = Guid.NewGuid().ToString();
string url=ViewData["url"].ToString();
string demo = "http://" + a + ":" + p + "/wifidog/auth?token=" + token + "url=" + url;

ViewData["authurl"] = demo;
Application["authurl"] = demo;
}

%>

dalong demo app
</h2>
<p>


<h1>
登陆页面
</h1>
<asp:Label ID="Label1" runat="server" Text="Label"></asp:Label>
</p>

[ <%: Html.ActionLink("进入", "MyLogin", "login")%> ]

Mylogin view 的代码如下:

<%

string tepdemo = "Auth: 1";
byte[] data = System.Text.Encoding.Default.GetBytes(tepdemo);
char[] list = System.Text.Encoding.Default.GetChars(data);
Response.Write(list, 0, list.Length);
Response.Redirect(Application["authurl"].ToString());
%>
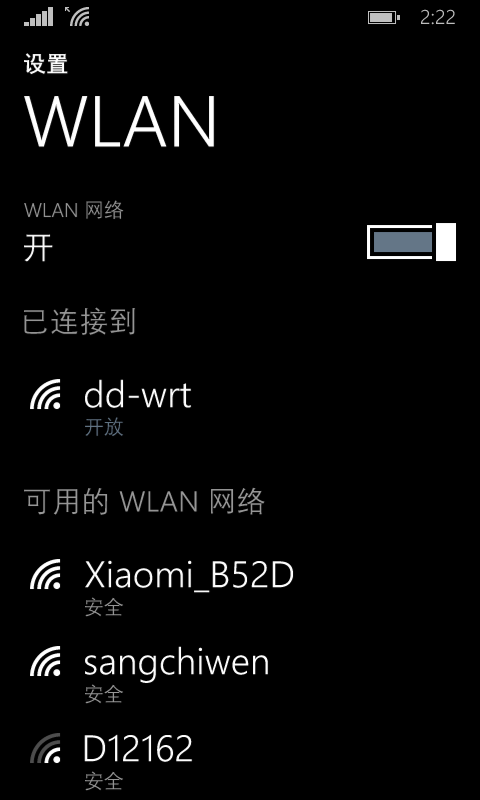
  1. 手机端的测试效果:
    4.jpg

window phone 连接wifi 的显示界面

点击进入如下效果:
5.png

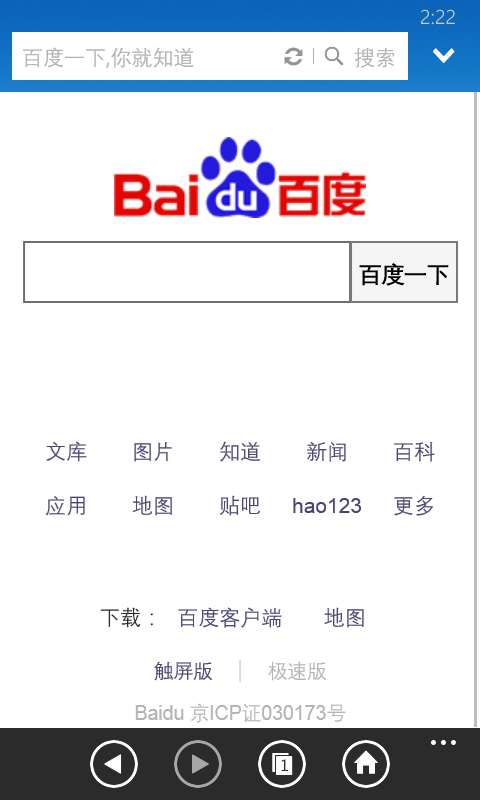
连接成功标志:

打开网页:
6.png

其中对于认证最重要的是按照协议返回的数据:

比如我通过返回的数据:

Auth: 1

拒绝为: Auth: 0

以上只是简单的测试,实际应用需要很多的东西。

本文章由 http://www.wifidog.pro/2015/02/06/asp-wifidog.html整理编辑,转载请注明出处

Wifidog鉴权服务器wifidog-auth的搭建

原来已经配置好的apache2、python、trac系统
在/etc/apache2/sites-enabled下增加的新的配置文件(域名和对应的目录)

sudo /etc/init.d/apache2 restart

这是可以用新域名访问对应目录下index.php了,但无法执行php代码只能下载该文件

sudo apt-get install php5
sudo apt-get install libapache2-mod-php5 # 安装遇到麻烦
sudo apt-get install postgresql
sudo apt-get install php5-cgi php5-common php5-pgsql php-pear php5-xmlrpc php5-curl language-pack-en-base subversion
sudo pear install XML_RPC
wget http://sourceforge.net/projects/phlickr/files/Phlickr-0.2.5.tgz
sudo pear install Phlickr-0.2.5.tgz
sudo apt-get install openssh-server
sudo apt-get install postfix
选择"internet site with smart host",然后配置

svn checkout https:// dev.wifidog.org/svn/trunk/wifidog-auth #放到/var/www目录下

现在修改文件/var/www/wifidog-auth/wifidog/classes/Dependency.php,否则智能安装会失败
$sudo vim /var/www/wifidog-auth/wifidog/classes/Dependency.php
将第122行改为:'website' => "http://www.smarty.net/" 
将第123行改为:'installSourceUrl' => http://www.smarty.net/files/Smarty-2.6.26.tar.gz

$sudo vim /var/www/wifidog-auth/wifidog/config.php
将define('DEFAULT_LANG', 'fr_CA');改为define('DEFAULT_LANG', 'en_US');

本文章由 http://www.wifidog.pro/2015/02/06/wifidog-auth.html 整理编辑,转载请注明出处